Our New Year’s Goals & Resolutions

funny-new-year-resolution

I’m generally in favor of New Year’s Resolutions. I like the idea of getting better as a person and trying to improve different aspects of life. This year, instead of doing individual resolutions, Blake and I had a mini-planning session and made goals for both of our businesses and our family for the year. (After reading that sentence, I feel like you may be led to believe we have it together way more than we actually do… it’s all really an organized mess but that’s one of the things we’re working on). So, after making some goals we figured out what needed to happen on a daily and weekly basis to get everything done… and alas we arrived at some resolutions.

For our own personal accountability, I’m making our resolutions public via this blog… here they are: (disclaimer: we didn’t write our specific resolutions down (only our goals) so these are the “resolutions” that come to mind… basically this is what we’re implementing to improve ourselves):

  1. Morning Quiet Time Together: this is my favorite resolution and I think it will have the most positive impact overall. It’s not a secret that I’m absolutely NOT a morning person, but waking up 30 minutes early to spend time with God and Blake is definitely worth it! We spend the 30 minutes reading from The Bible or a devotional, talking about what we each have planned for the day, and then praying together. We’ve never done something like this before but I’m really excited to see how it improves our relationship with each other and with God.
  2. Business Power Hour: this one applies more to me than Blake. Blake runs his/our landscape business full time so he’s working towards the goals we have for that business all day. My business as a fitness coach is only part-time but I want to maximize my success even though I can’t commit full-time hours. To accomplish that, I’m committing to a daily “power hour” – meaning I spend one hour each day doing the most purposeful tasks to grow my business. Last year was the first year I starting investing time and effort in to growing my fitness coaching business and the results were amazing (so much more so than I anticipated), so I can’t wait to see how intentional, daily activity will continue that growth trend.
  3. Create a Budget & Stick to It: As we grow our businesses and grow our family this one is essential. Prior to our planning session, I created a draft of our budget. We made a few minor changes… now it’s all about sticking to it. Easier said than done.
  4. Monthly Planning Meetings: Creating goals and resolutions is great, but if we don’t stick to them it’s kind of a waste of time. So once a month we are going to re-convene to see where we’re at with our goals and determine what specific things we need to do the next month to keep moving toward our goals. Also, we like going out to eat so this will give us the opportunity to do that (while still sticking to our allocated budget for “restaurants”)
  5. Spread our Influence: we all have the power to influence others and make a positive impact on their livees. Sometimes we get so consumed with our daily lives that we forget to think about other people and how we can help them. With my business, I’m in a unique position to help people with their health and fitness goals (from my experience, improving your health and fitness also creates a boost in confidence, productivity, attitude and a whole lot of other great things). So for me, I would love to help a whole lot of people with their health and fitness goals this year.

One thing we really struggled with this past year was keeping our house clean – so a cleaning schedule was going to be part of the goal list as well… but then we got a Roomba. It is amazing and if you don’t have one, you should get one. Also it will knock a whole line item off your goal and resolution list.

I am really excited for 2016. I just have this feeling that it’s going to be awesome. Oh yeah, and we’re having a baby so it’s pretty much guaranteed to be awesome!

signature

The First Trimester: In A Few Sentences

a7164f975862e87c8749a3f63d25a1b9

I’m officially at Week 14 so no matter how you count it, the first trimester is over! 33.33% of the way there. Just for fun here are 1-2 sentences that capture the thoughts, feelings or general circumstances surrounding each week.

Week 1: Absolutely nothing has happened yet, but I distinctly remember having a conversation with Blake that went something like this: Blake – “When do you think we should have another kid?” Me – “Well I definitely don’t want to be pregnant over the holidays again so let’s re-address this in December or January.” The irony.

Week 2: According to most “pregnancy calculators” we unknowingly created a baby sometime this week – I have zero recollection of when this might have occurred.

Week 3: Still blissfully unaware and packing for a family trip to Cancun. Had I known I wouldn’t need the box of tampons, I would have had room for one more bikini to show off the abs I worked so hard to get back.

Week 4: Cancun baby! (pun intended). Luckily, we were chasing after a 1 year old most of the trip so while there was drinking involved it wasn’t as heavy as it could have been.

Week 5: Crap… I never used those tampons I packed. Maybe I miscalculated but I’m going to an open bar wedding this weekend so I should probably check just in case. Crap… not going to be able to take advantage of the open bar.

Week 6: Seriously, my abs were just there… where did they go? It’s only week 6. I worked so hard to get those back!

Week 7: Turns out the only thing harder than attending an open bar wedding while pregnant it attending a bachelorette party while pregnant. Although I didn’t drink, I did get to enjoy the feeling of a mutual hangover with everyone else each morning.

Week 8: Who stole ALL of my energy. SO TIRED. Also, why do I only want to eat spaghetti os?

Week 9: I heard a heartbeat and got a picture… I know exactly who stole (and is still stealing) all the energy. This just got a little bit more real.

Week 10: It’s confirmed – this pregnancy sucks a lot more than the first one. I feel crappy and am always tired. Thank God for Blake – who is cooking, cleaning and folding laundry like a champ BUT if he asks “why are you so tired?” one more time, I will use my very last ounce of energy to punch him in the face… I won’t even be sorry.

Week 11: I got the “go-ahead” from the doctor to consume up to 300 mg of caffeine per day and add Shakeology back into my diet – Hallelujah! For the record I’m not drinking 300 mg of caffeine per day… but I am enjoying coffee again or more specifically skinny vanilla lattes! (I abstained from caffeine during pregnancy #1… what a cocky jerk I was then.)  Also, I love you Shakeology and I’ve missed you for the past 4-5 weeks – at least I know I’m getting good nutrition now (in addition to the stellar nutritional content of spaghetti os).

Week 12: The “news” is public thanks to a pretty cute Christmas card featuring my favorite child who caused absolutely zero pregnancy symptoms. It feels even more real. We’re having another baby… Blake is excited; I’m terrified. Same as last time.

Week 13: The last week of the first trimester… isn’t my energy supposed to be returning. The answer is no. It’s not returning, baby #2 is still hogging all of it. My evening productivity is at an all time low. Blake is a super hero for keeping the household running (but let’s not kid ourselves, he’s always been the one that keeps the household running).

Only 27 more weeks to go… it better only be 27 more weeks- I’m talking to you Baby #2.. you have an opportunity to win some major “favorite child” points back by arriving on time, just sayin’.

signature

It’s All Fun & Games Until Someone Gets Pregnant… Again

20151121-_DSC0205

Blake and I were on the same page about wanting more than one kid. After all, Carter needs a playmate who doesn’t carry toys around in his mouth – she has picked up this habit from the dogs – it’s funny but also socially frowned upon. We were aiming for Baby #1 and Baby #2 to be 2-3 years apart… the way it’s looking now, they’re going to be 22 months apart… which rounds up to 2 years… if you’re the kind of person who rounds up.

It’s clear Baby #2 is not going to be quite as easy as Baby #1. When I was pregnant with Carter there were zero (read: 0, none, nada) symptoms. It was easier to rationalize extra servings of ice cream, but beyond that, no cravings, no nausea, very little fatigue. Life was good, and I pretty much rocked at being pregnant. I know, I hate me too.

This time around, I am left desperately looking for the Space Jam monsters who surely sucked out ALL of my energy and are using it to fuel the Carolina Panther’s improbable run at an undefeated season. For all you Panther fans out there, I’m taking one for the team. You’re welcome.

Space_Jam_17

The nausea has be annoying but not debilitating and my abs disappeared almost immediately. I worked so hard to get those back, couldn’t they stick around at least through the first trimester? The answer is a clear: no.

Don’t get me wrong, we are excited about Baby #2 and in the scheme of things, I know pregnancy can be a lot worse so I am grateful. As of right now, I am healthy and the baby is healthy and Blake is ok with taking on extra laundry duties so relatively speaking things are going great.

Now that the pregnancy secret has been spilled, I will be blogging a lot more frequently. During the “we-know-but-aren’t-telling-anyone” phase, it’s hard to hold a conversation without feeling like you’re omitting a huge detail of massive importance – it’s a little bit like having to go pee really bad while on a car ride and trying to hold it for as long as possible. Once you finally go (or in this case, reveal the pregnancy news) it’s a huge relief.

For the record, I think it’s going to be a girl… more on how I feel about that later.

signature


The Best Diaper Rash Cream EVER!

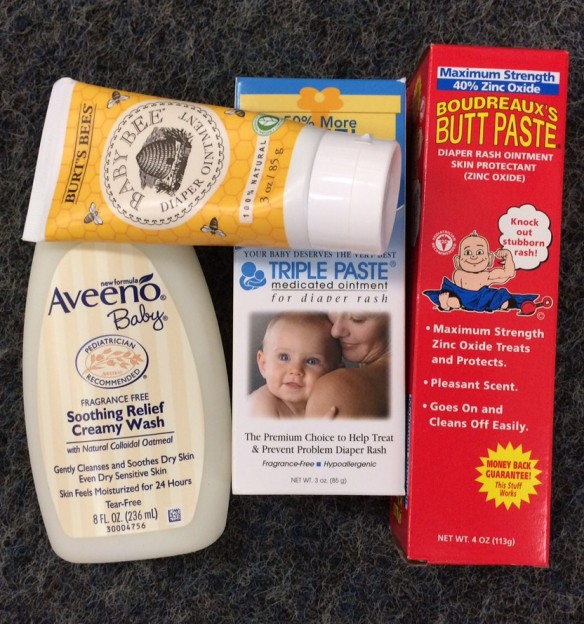
IMG_5456Last week Carter developed the worst diaper rash I’ve ever seen (note: I’ve only ever seen her diaper rash but still it was bad). We knew it was bad because she screamed during diaper changes and was pretty fussy. That is a big deal for Carter – Blake and I are completely aware that we have “trick baby“- she hardly ever cries- usually if she is fussy it’s because we’re doing something wrong. Clearly, we had done something wrong along the way that had caused this and we were hell bent on fixing it as quickly as possible. I did what most moms would do in the situation – I googled any solution I could find. Blake is generally skeptical of this “google” strategy but his “status-quo” method wasn’t working so I started testing and implementing any and all diaper rash remedies.

First I tried to pin down the cause. Unfortunately typing “cause of bad diaper rash” into google is similar to typing in “headache” as a symptom in WebMD. There are a bazillion things that can cause diaper rash and I immediately began questioning all my recent parenting decisions.

Had we switched to whole milk too fast? We made the switch a few weeks ago and she seemed fine with it but now I’m reading about the plethora of babies who had awful reactions. Solution: Revert to a formula for a few days (our breast milk reserves were out!) to see if that would fix it.

Was it something she ate? Her diaper rash appeared one day after her first birthday party. At the party she had cake and barbecue… did she have a buttercream aversion? Solution: Implement the BRATY diet. Luckily she LOVES bananas (almost obsessively).

Was it the wipes? We use Huggies wipes and she has always been fine with those but then the news broke that they apparently have fiberglass in them.. was this just a cruel coincidence or had I been wiping her sensitive skin with glass shards. Solution: utilize the huge stock of baby wash clothes we got before she was born and use those to wipe… no not wipe… “pat” clean.

Did our diaper cream suck? The short answer here is Yes, yes it did. We used to use Balmex and Destin but the low-maintenance nature of Carter had lead us down the arrogant path to generic brand diaper cream. I know, we’re ashamed. Seriously, who doesn’t splurge the extra $3 for brand name diaper cream to prevent painful blisters from forming on their kid’s ass? The answer: us. Lesson learned! After the first screaming diaper change – I bought ALL the creams. That picture up top is proof. (Not pictured: The Aveeno Oatmeal Bath Soak).

Should we stop using disposable diapers? I was really hoping and praying that this was not the cause so I put blinders on and didn’t even consider this as a possibility.

I even let her run around with no diaper for a few hours per day. Blake hated this strategy, but literally every source I read mentioned this as a legitimate way to cure the rash. Carter didn’t love it either… after about 5 minutes of no diaper she crawled up the stairs to the clean laundry basket and brought me a pair of clean shorts… I got the message – she’s fine in just a diaper but draws the line at anything less than that (makes me a little proud!). I put the shorts on but left the diaper off – I figured we clean the dogs pee and poop off the floor so why not hers. Still though, there was hardly any improvement in the rash.

After switching away from whole cow’s milk, changing her diet, eliminating wipes, using various creams, giving soothing oatmeal baths and allowing her to crawl around with no diaper, the improvement in the rash was marginal and she was still not happy about it. Neither were we.

But then, the Best Diaper Rash Cream EVER was shared with me. Carter’s day care teacher mentioned Maalox cream as a possible solution. I figured I would pick some up at Target, at this point I would try anything- BUT, it’s not something you buy, it’s something you make. So I whipped up the concoction. Here’s the recipe:

The Best Diaper Rash Cream EVER:

  • 1 oz. Maalox (or generic antacid)
  • 1 oz. Aquaphor
  • A sqeeze of anti-fungal medication

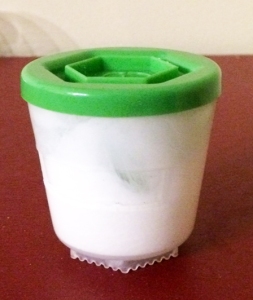
Mix all ingredients and apply liberally to the entire diaper area. Top with Boudreaux’s Butt Paste. I stored it in her 2oz food containers.

IMG_5476 IMG_5479


This cream is magic. The diaper rash was 100x better in 4 hours and completely gone (blisters and all) in 3 days.

I’m not completely clear on how it works – here’s is what I know: The active ingredients in the Maalox neutralize the acidity of the pee and poop. The Aquaphor helps heal the damaged skin. The anti-fungal just ensures it’s not a fungal rash (if you know that’s not the case, you can leave it out…. I have no idea how you would know though so I added it). The Butt Paste creates a great barrier between the skin and the diaper.

We have now transitioned back to whole milk (I’m so glad it wasn’t that) and her normal food (which still consists primarily of bananas and mac and cheese). We’ve returned to using wipes (although we switched to Pampers Sensitive wipes mainly because of the potential for fiberglass in the Huggies – I don’t know whether that’s actually true, but I’m not taking chances). We’re not going back to generic diaper cream… at this point we have about a year’s supply of all the good stuff.

Next time your kid has killer diaper rash, skip all the other crap and head straight for the anti-acid aisle. The Maalox cream is LEGIT!

signature


DIY Cake Smash Photo Shoot

20150812-IMG_3093

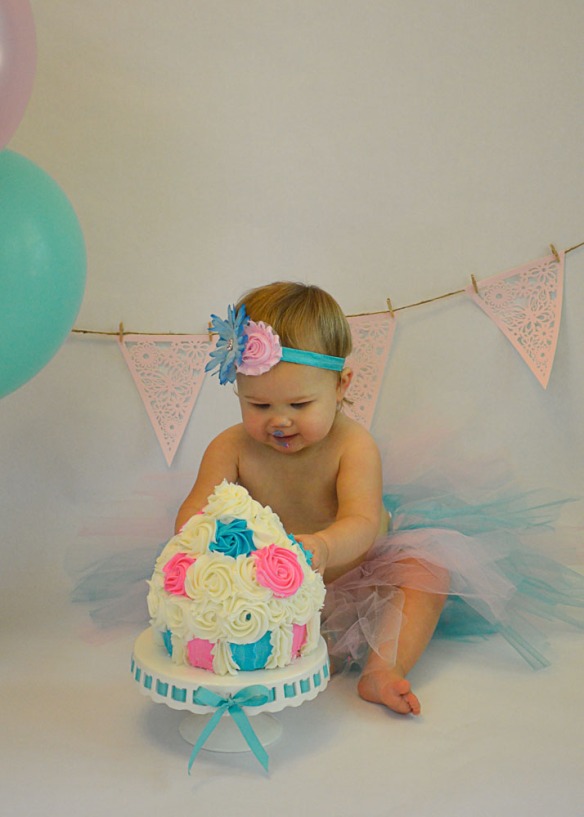
Who doesn’t love a good cake smash pic? Since Carter’s birthday party was after her actual birthday, I decided to do a cake smash and document it via a million pictures to celebrate her actual first birthday.

My sister and I both have DSLRs – we aren’t professional photographers but we can use the camera in semi-manual modes so I figured we could pull it off. After reading a few blog posts of other mamas who did their own DIY cake smash shoot, I was confident that this was going to go great. Plus I had a super cute subject (admittedly biased opinion). Turns out, I was right – I love it when that happens. The cake smash photo shoot was a huge success. Here’s how we pulled it off.

Materials Needed:

  • PVC Frame (super easy to put together….literally anyone could do it, in our case, Blake was in charge of this part)
  • A roll of seamless paper (can be found at arts and crafts stores) – we shopped locally and got one at Not Just Paper
  • Some decoration.. you could use balloons, streamers, confetti, toys…anything to add some color and fun
  • A great outfit. This isn’t required but it’s a plus. We got Carter’s outfit here. We were a little worried she would boycott the headband since she doesn’t normally wear head pieces, but once we shoved cake in front of her she was oblivious to anything else
  • A Cake. Suzie Q made ours
  • A decent camera. I own a Nikon 3200 and my sister has a Canon that is similar

First Blake built the frame and then I did the general scene prep. We set the scene in our kitchen area where our kitchen table usually sits because we get a lot of natural light there from the widows to the right and from the sliding doors that go to the deck.

IMG_5348

pvc frame

IMG_5349

Super easy set up

Next we placed the cake.

20150812-_DSC0015

Cake and Setting (Before Pic)

20150812-_DSC0143

Cake and Setting (After Pic).


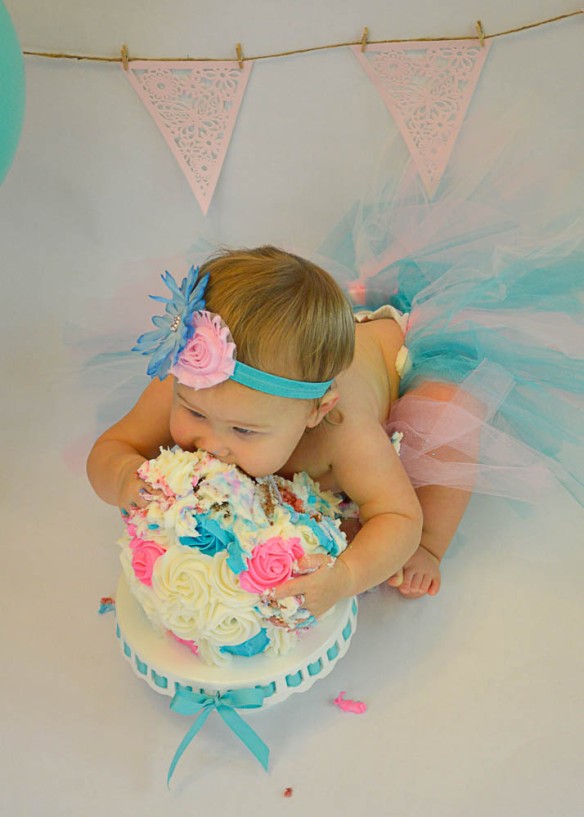
I read that some kids don’t love cake or don’t dig in right away so I was prepared for that… but… Carter is a natural and dug right in. I think she was a little skeptical at first, but as soon as that sweet sugar hit her lips, she was all in!

Here’s are some of the pics we captured:

20150812-_DSC0019

She started slow… a little taste of the icing first.

20150812-IMG_2926

A better grip on this cake will help!

20150812-_DSC0069

This is when she realized that yes! I do indeed love cake.

20150812-_DSC0067

So good!

20150812-_DSC0034

This is when things got serious. She wasn’t messing around. This is when she mentally committed to eating the entire cake.

20150812-_DSC0035

Not joking.

20150812-IMG_2997

All the cake. In the mouth. Two hands.

20150812-_DSC0130

Just taking a little break to make more room in the belly.

20150812-_DSC0267

Cousin Ben wanted in on the action. He knows the joy of cake smashes and is legitimately happy for Carter. Clapping even.

20150812-_DSC0276

Ben is really serious about his cake. You don’t get that solid eating broccoli, am I right?

Obviously, hiring a professional photographer to do your cake smash photo shoot will ensure great pics. But, don’t be afraid to try it on your own! It will save a little money and you will have so much fun! (This entire DIY cost us about $50).

A few more camera details: my sister used a 35mm lens with a lower aperture setting and I used the stock lens my camera came with…honestly I don’t remember the settings I used (which is one of the many reasons why I’m a professional).

To close out here are my Top 5 Tips for pulling off your own cake smash photo shoot:

  1. Take a ton (like more than 100 pictures). A lot of them ended up blurry but the key is to just keep snapping pics. The more you take the better chances of getting a good one.
  2. Make sure you have good, natural lighting. As I’ve said before, I don’t know a lot about photography but I know lighting is key.
  3. Be prepared for a mess. Know that everything is going to get cake on it. Be ok with that.
  4. Get some help. Get the rest of the family involved – if you’re behind the camera, it helps to have someone to place the kid in front of the cake and redirect them back to the cake when they can no longer focus due to sugar overload.
  5. HAVE FUN/ DO NO STRESS – this is fun. Make it fun. Your kid is eating cake, you’re watching. Relax and take it in… if you’re doing this for your kid’s first birthday you should have some cake too. You survived the first year which means you’re a super hero and awesome… pop open a bottle of champagne while you’re at it… or maybe wait until after the shoot.

signature

Baby Purees: The Good, The Bad, The Ugly. (A step-by-step guide)

IMG_3652

The decision to personally prepare all of Carter’s first baby purees was a classic result of my decision making algorithm. It also helped that Blake was completely on-board and took it upon himself to prepare the purees the first few times… after he realized there was a “bad and ugly” part to the process he was less enthusiastic and resigned as her personal puree chef.

Blake prepared and packaged all of Carter’s first “Level 1” purees. These purees include just one ingredient and can easily be packaged into convenient 2 oz. containers.

Level 1 Baby Purees (Step-by-Simple-Step)

Step 1: Pick a few “Level 1” foods (ex. bananas, sweet potatoes, pears, etc.)

Step 2: Steam/puree the food (we used a Baby Bullet which came with a convenient guide and provided “recipes” – basically the recipe details the amount of water that needs to be added to make the fruit or vegetable into a puree… if you don’t have a Baby Bullet you can guess and check – it’s not rocket science).

Step 3: Pour puree into a 2 oz container (available at any baby store or walmart/target).

Step 4: Refrigerate or freeze puree depending on how soon you will be using it.

Simple, right? Yes! Blake prepared all of these Level 1 foods like a champ and all was good.

Then “Level 2” foods came along. While there are specific additional foods that are recommended as babies get older, the goal here is to start mixing flavors and developing a “mature pallet.” Literally, I read about this “mature pallet” thing on multiple blogs. Yall, I didn’t have a “mature pallet” until like 2 years ago – I basically survived on chicken nuggets and mac&cheese until I was in my mid-20s even though I’m sure my parents fed me fruits and vegetables as a baby.

But I was committed to making all of Carter’s baby food – it’s cheaper, makes me feel like a good parent, blah, blah, blah, so I pushed forward. Prepping, mixing and packaging 6-8 month purees is a process. I officially found “The Bad” and “The Ugly” in making baby purees (although those “finds” may have everything to do with still being a sleep-deprived, hormonal new mother and less to do with it actually being a frustrating/time-consuming process) but still.

Level 2 Baby Purees (Step-by-Step)

Step 1: With Level 2 purees the first thing to do is determine what type of mixtures you would like to try. Since this step involved decision-making, it was hard for me. Here are a few purees that are Carter approved:

  • Broccoli/Apple
  • Carrot/Mango/Apple
  • Chicken/Avocado/Butternut Squash
  • Peas/Pears/Banana
  • Zucchini/Banana
  • Turkey/Apple
  • Chicken/Sweet Potato
  • Green Beans/Apple

General rule of thumb: When in doubt, mix with apples. Carter also loves bananas so we mixed in those with anything she wouldn’t eat.

This makes the work worth it.

Carter enjoying bananas and tolerating peas and pears.


Step 2: Next, buy all ingredients. Theoretically you could decide on proportions for your mixtures ahead of time and buy the appropriate amount of each food but that makes far too much sense. I just eyed the contents of my cart as I shopped and thought “yeah, that’ll work!” (I was still enthusiastic about my homemade food at that point).

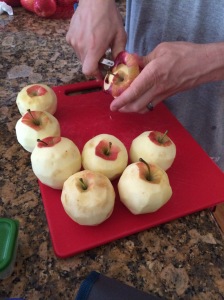
Step 3: Peel, steam and puree all ingredients. Here is where I grossly underestimated the amount of time this would take. I highly recommend you invest in a heavy duty peeler. Also worth noting – when pureeing, give the Baby Bullet breaks… it will overheat and it will break down…. if you happen to have a Ninja blender I suggest using that for the entire process.

Literally took half a day to peel and steam everything.

Peeling for days.

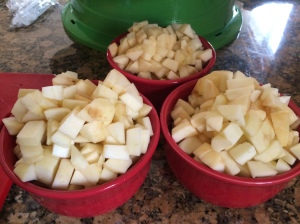
I would eat apples everyday if they were chopped like this.

Ready to steam.

It looks pretty.

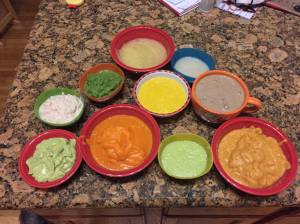
The puree food triangle.


Step 3.5:
Take a break and do some yoga or mind relaxation techniques. I skipped this step which is why you see empty beer bottles in the pictures below.

Step 4: If you skipped Step 3.5, you are probably over the whole process and want to curse the Baby Bullet book that incorrectly states “Make a week’s worth of meals in 5 minutes.” WRONG. But at this point, your best bet is to push through… it’s for the baby, you are saving money (tell yourself what you have to). Step 4 is packaging.

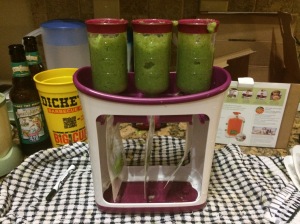
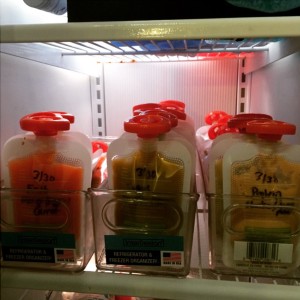
At this point, we decided to package the food in convenient squeeze packs using this Infantino Squeeze Station. Convenient in that, once made, we can simply pull a “fruit,” “vegetable,” and “protein” squeeze pack to pack in Carter’s lunchbox and she will be set for the day. The actual packaging process is not convenient at all. Here’s what you will need: a bowl to combine your mixtures, a washcloth to clean the spatters as you push the puree into the bag, a chopstick to unclog the contraption when tiny bits get stuck, a beverage of your choice to help you cope, a filter for the 4 letter words that may fly from you mouth every time the contraption gets clogged.

Basically, you combine your mixture and then pour or spoon the mixture into holding stations which are attached to 4 ounce plastic baggies. You then use the ramming rod (my term, not theirs) to push the puree through the holding tubes into the bags. Then cap and label the bags. Often times, the blender doesn’t do its job and small bits of apple or carrot clog the process – at this point, it is as if the world is working against you and you have no choice but to drink an adult beverage. (Helpful hint from Jen, my sister and master puree-er – use a slotted spoon to catch these bastard chunks before they clog up your process… I should listen to her more often.)

The Squeeze Station.

The Squeeze Station.

Step 5: Put everything in the freezer. Well done. Well done.

The finished product.

The finished product.

So, there you have it. If you choose to make your own purees – Bravo! If you would rather pay for someone else to do the work and fork over the cash, hey- I’m not judging.

*Disclaimer: Nothing in this article is based on scientific evidence or research. We supplemented home made purees with Gerber Oatmeal and added in yogurt when she reached 7 months. Now she eats finger foods like Cheerios, Goldfish, Cheese, etc…. so clearly we aren’t sticklers for organic and home-made… my decision scale balances though.

signature

Parenting Decisions: My Algorithm

I really love diagrams

There are dozens of birthing classes an expecting mom may take to help prepare her for the “birthing process.” A process that takes somewhere between one and thirty-six hours (give or take). There are zero classes that cover what to do in the 18 years following the result of the birthing process.

Why is there not a class for this? Literally, classes are required for almost all skills and responsibilities. Want to drive a car – you have to take a class. Want to own a gun – you have to take a class. Want to serve coffee at Starbucks – you have to get hired and then take a class. These classes tell you exactly how to make decisions based on circumstances at hand and achieve a successful outcome.

But when it comes to being responsible for the survival of a helpless infant and the gazillion decisions it takes to transform that infant into a decent and productive member of society … no class, no instruction, you’re on your own…. good luck!

Of course there are hundreds of books and millions of websites that provide some guidance but everything is so controversial and judge-y. The information overload and high horses of “moms who know best” are overwhelming!

Instead of hitting up the internet every time I have to make a parenting decision (which, despite my attempts in the first few weeks, is not sustainable long-term and will in fact leaving you certain you are doing it wrong), I have developed an algorithm for making the majority of my parenting decisions.

My algorithm is based on 2 things:

  1. WWJD – What Would Jen Do. Jen is my older sister – she had her first son, 9 months and 1 day before I had my first daughter. She is very wise. For the past 28 years I have been using the WWJD method for general life decisions with good success. If it ain’t broke, don’t fix it – so WWJD for parenting decisions too! I’m not going to lie… I planned it this way – there was no way in hell I was having a kid before Jen did. Here’s an important key to this step: I don’t always do exactly WJWD (What Jen Would Do). I think of it more as a template. I use her decisions as a general framework and make customizations that make sense for me. To make this algorithm universal or usable for you, you are going to need to find yourself a Jen. This person doesn’t have to be related but does have to have similar morals and viewpoints.. it also helps if they’ve had a kid recently. Find someone who you look at and think ‘hey they’re doing something right.’ Then use their decisions as a template.
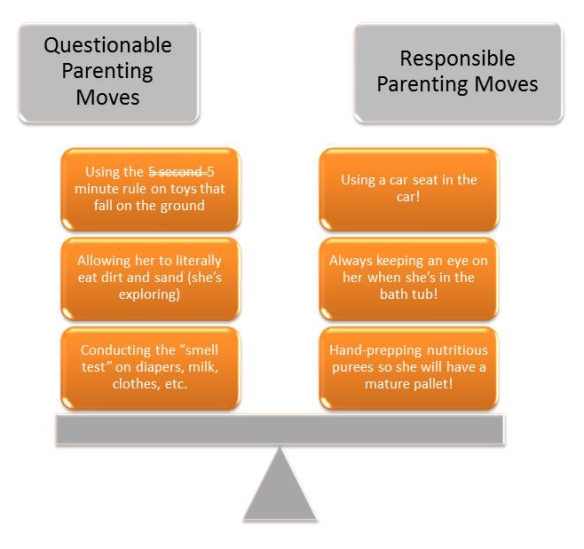
  2. The Scale. I would classify my parenting style as laid-back – this style is closely associated with some questionable parenting moves. I try to balance the questionable moves with more responsible parenting decisions – I do this by keeping a mental scale of questionable vs responsible parenting moves. Using the WWJD method first (aka following Jen’s template) automatically puts me in a position to make decisions that are more responsible which gives me a little leeway to make some questionable moves while still staying on track to achieve the goal of developing a decent human being. Below is an actual representation of how my scale looks… ideally, I want the scale leaning towards the responsible side but I will settle for balance.

The Scale... questionable responsible

When everything is put together the full algorithm looks something like this: I start with WWJD, make personal customizations based on my unique parenting style and control for how the resulting decision impacts my responsible parenting scale. It sounds complicated but it is way less time consuming than searching the endless walls of the internet for statistically biased information on unproven methods.

What’s your process for making parenting decisions? (I’m almost scared to ask that because I’m pretty confident in my algorithm as it is now and also, I know how the comments section can get when discussing parenting techniques – play nice please!)

signature


**Edit: It should be noted Blake (my husband) makes his fair share of parenting decisions. While we have the same parenting philosophy and are in constant communication about how to best raise our daughter, when asked how he makes parenting decisions he responded “I base my decisions on what’s best for Carter.” He is clearly less neurotic than I am.